Disclaimer: This blog and its author are not affiliated with Ojai Olive Oil Company in any way. Designs featuring their likeness are for educational use only.
This week, I edited video for the first time and I did so in Photoshop. Before this week, I didn’t even know you could edit video in Photoshop, so I was impressed with the number of features and fair ease of use. I followed this lynda.com tutorial to edit the provided video. The video features the founder of Ojai Olive Oil Company discussing the history of his farm’s olive grove and the olive oil production process. There is a lot of beautiful scenery throughout however the speaking portion of the piece is pretty dry and the accompanying soundtrack is a little hokey. The video and audio are provided on a single track, so unfortunately, the music had to stay.
I first edited the video to shorten its length. The original video is about two minutes long. According to an article posted on The Next Web, testimonial or “talking head” videos should be between 60 and 119 seconds in length for marketing purposes so that it will appeal to a wider audience online than just those who really want to learn more about the company. I edited out some superfluous frames from the start so that my opening screen – the first thing consumers see when they come across the video – is intriguing with the image of a sign pointing the way to learn more about Ojai Olive Oil. I also cut out the entire second portion of the video that discussed the olive oil production process since the video cuts off in the middle of the description. After editing my video, it’s now 68 seconds.
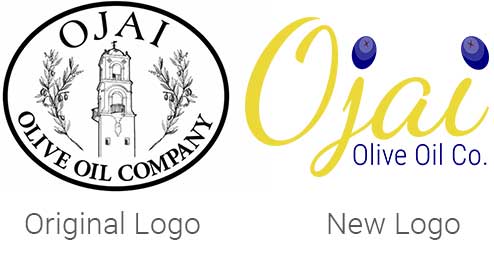
I created a new logo for the company to include in the video since their current logo is outdated and not very flexible since it includes very detailed imagery. I updated the logo with new typography (Dancing Script and Roboto Condensed from Google Fonts) and included the brighter colors from their website color palette – deep blue and gold – for a more contemporary design. I created a couple olives in Illustrator and brought them into Photoshop to dot the i’s in “Ojai.” For my title screen, I faded the logo in on a semi-transparent background and then changed the logo style and opacity to move it into the bottom right corner of the screen for the majority of the video – this is called an ID bug. I also faded in a brief line of text to describe the contents of the video – “About Our Ojai Farm.”
For the founder’s interview, I included a feathered, semi-transparent lower-third in gold with the gentleman’s name and title to give him credibility. I moved and faded out the lower third once he was off-screen so the viewer could take in all of the gorgeous scenery featured at this point in the video.
To end the video, I faded out the founder as he wraps up a discussion on the colors of ripening olives. As a cute transition between the interview and the closing slide, I created a separate, taller layer scattered with the olives I created for the logo and triggered an animation to show them falling down the screen. This then fades into the now full-color logo and company contact information.
Overall, after I understood how the animation tools worked, I enjoyed using Photoshop for basic video editing and animation. I also see how video editing can become extremely time consuming, editing out frames and adjusting fades and effects by the tenth of a second. The animation I played with is fairly smooth, but I believe for motions more complex than simple direct movements or rotations across the screen, Photoshop probably isn’t the best program.